If you’re looking for a beautiful, durable, and easy-to-install flooring option, consider LVP wide plank flooring. It’s a popular choice for many homeowners because it can mimic the look of hardwood floors without the high cost or maintenance. In this article, we’ll take a closer look at what LVP wide plank flooring is, its benefits over other flooring options, the top brands to consider, and a step-by-step guide to DIY installation. We’ll also go over when it’s best to hire a professional for the job, factors to consider when choosing an installer, and the cost of professional installation. By the end of this guide, you’ll have all the information you need to make an informed decision about LVP wide plank flooring for your home.
What is Wide Plank LVP Flooring
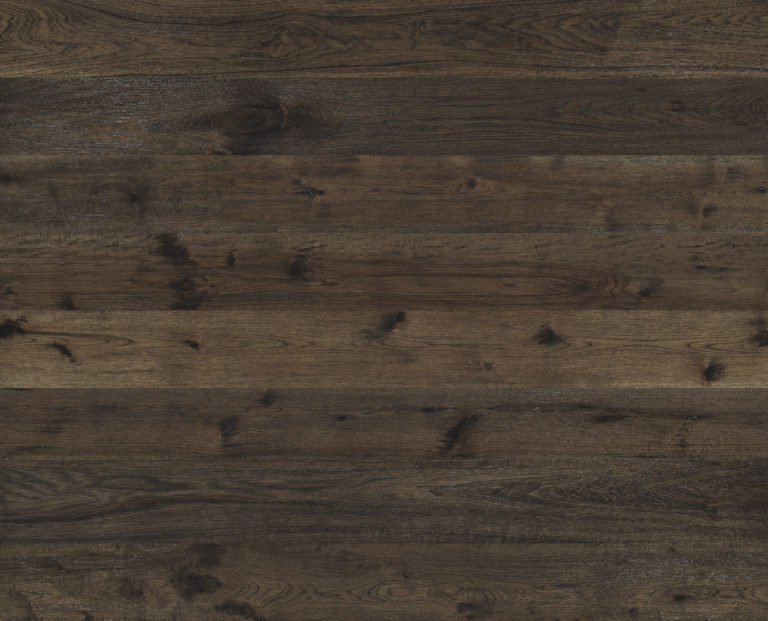
Wide plank LVP flooring is a type of luxury vinyl plank flooring that features wider and longer planks in comparison to standard LVP offerings. It is made up of multiple layers that work together to create a durable, comfortable, and stylish surface for any room in your home. The width of these planks typically ranges from 5 to 9 inches, whereas standard LVP planks are around 3 to 4 inches wide.
These wider planks offer a more distinctive and eye-catching design, often resembling traditional hardwood floors. The wider planks also provide a unique aesthetic, as they emphasize the natural beauty of the vinyl materials and create a luxurious atmosphere. Wide plank LVP flooring is made to closely mimic the appearance of natural wood, including grain patterns and color variations, giving you a sophisticated and timeless look that matches any home décor.
Benefits of Wide Plank LVP Flooring
Wide plank LVP flooring offers a variety of benefits, making it an ideal choice for homeowners looking to upgrade their floors without sacrificing style and performance. Some of the key benefits of wide plank LVP flooring include:
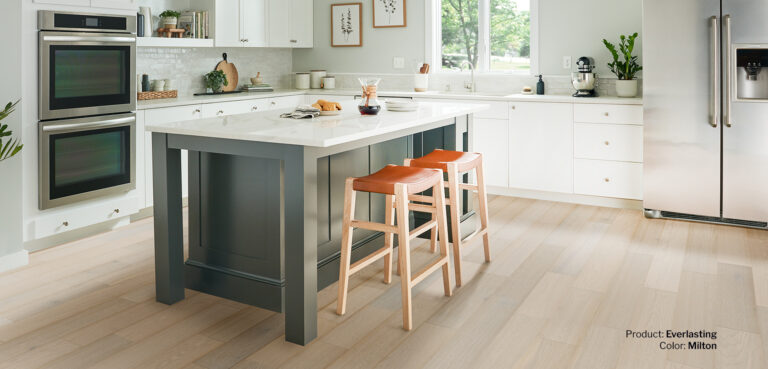
- Stylish appearance: Wide plank LVP adds a luxurious and elegant touch to any room, closely mimicking the look of hardwood flooring without the high price tag. With a wide range of textures, colors, and finishes available, there’s a style to suit any taste.
- Increased durability: Made with multiple layers of sturdy materials, including a wear layer for increased scratch and stain resistance, wide plank LVP flooring is designed to withstand heavy foot traffic, making it suitable for both residential and commercial applications.
- Easy installation: Most wide plank LVP flooring products come with a click-lock system that makes for a simple DIY installation process, saving time and money. No glue or nails are required, and the planks can be installed on various subfloors or even over existing flooring.
- Water resistance: LVP flooring is highly water-resistant and can handle moisture better than traditional hardwood flooring. This makes it an excellent choice for kitchens, bathrooms, and laundry rooms where spills and moisture are common.
- Comfort: With a softer underfoot and better acoustic properties, wide plank LVP is a more comfortable choice for those who spend a lot of time on their feet. The thicker, multi-layer construction also provides insulation, helping to keep your home warmer during colder months.
- Low maintenance: Wide plank LVP flooring is exceptionally easy to maintain—sweeping, vacuuming, and occasional mopping will keep your floor looking new for many years to come.
With these benefits, it’s easy to see why wide plank LVP flooring is gaining popularity among homeowners looking for a stylish, durable, and affordable flooring option.
Best Brands of 2024
High Performance Flooring
Where Fashion Meets Flooring Order Samples
Brilliant Floors, Intelligently Priced Order Samples
Ultimate Destination For Luxury Flooring Order Samples
Tools and Materials Needed
To successfully complete a DIY project, you’ll need to gather the right tools and materials. The specific tools and materials will depend on the project you’re undertaking. However, there are some general items that will come in handy for most tasks.
Essential Tools Include
To install wide plank LVP flooring, you will need the following supplies:
- LVP flooring planks
- Underlayment or padding
- Adhesive, if required (depends on the type of LVP flooring)
- Measuring tape
- Straight edge
- Utility knife
- Flooring cutter or saw
- Spacers
- Pry bar
- Hammer
- Tapping block
- Level
- Pencil or chalk for marking the cuts
- Safety glasses and gloves
It’s important to check the manufacturer’s instructions for specific installation requirements and recommended tools/supplies.
Keep in mind that different projects may require specific tools and materials not listed here. Research your project thoroughly before starting and consult expert opinions when necessary.
6 Steps for LVP Wide Plank Flooring Installation
LVP flooring is a popular choice for many homeowners looking to upgrade their homes due to its durability, water resistance, and realistic wood-like appearance. LVP wide plank flooring installation may seem daunting, but it can be a manageable DIY project with the right guidance. This article will explore the six essential steps for installing LVP wide plank flooring and provide helpful tips and advice to achieve professional results.
Step 1 – Acclimating the Flooring
The first step in the LVP wide plank flooring installation process is acclimation. Proper acclimation is crucial for the longevity and performance of your LVP flooring, as it allows the planks to adjust to the humidity and temperature levels of your specific environment. This helps to prevent potential issues such as buckling, warping, or gapping after installation.
Step 2 – Removing Existing Flooring
Before you can begin installing new flooring, the existing flooring must be removed. This process varies depending on the type of flooring you’re replacing. Once the old flooring material is removed, it’s essential to thoroughly clean the subfloor, ensuring that it’s free of debris, nails, and adhesive residue. Address any necessary repairs, and ensure that the subfloor is level before moving on to the next step.
Step 3 – Installing the Underlayment/Barrier
Choosing and installing the appropriate underlayment is crucial for the longevity and performance of your new flooring. Underlayment provides a layer of cushioning and moisture protection between the subfloor and the new flooring material, which can help to prevent mold, dampness, and other issues.
Once you’ve chosen the appropriate underlayment for your needs, follow these steps to install it correctly:
- Starting in a corner, roll out the underlayment parallel to the direction the flooring will be installed. Leave a small gap (approximately 1/8 inch) between the underlayment edge and walls to allow for expansion.
- If your underlayment has an attached moisture barrier, ensure that the barrier side faces downward, contacting the subfloor.
- Trim the underlayment as needed, using a utility knife to cut the material along the edges, corners, and doorways.
- Continue rolling out and cutting pieces of underlayment, ensuring that each one fits snugly against the previous one without overlaps or gaps.
- If your underlayment does not come with an attached moisture barrier, apply a separate, plastic sheeting moisture barrier over the underlayment, overlapping seams by at least 8 inches and sealing them with tape.
- For added stability and seam control, secure the underlayment with duct tape, ensuring that it lays flat and remains in position during the flooring installation process.
Following these steps, you’ll have a well-prepared surface that’s ready for your new flooring. Properly installed underlayment offers countless benefits, including improved comfort, insulation, moisture protection, and sound reduction, while also helping to ensure a successful and long-lasting flooring project.
Step 4 – Cutting the Planks
Cutting the planks to the desired length is a crucial step in the installation process of Luxury Vinyl Planks (LVP). Proper cuts ensure a professional appearance and a clean installation. Here, we will discuss the types of tools and techniques to measure and cut LVP precisely.
How to Measure and Cut Precisely
Accurate measurements and cuts are key to a successful LVP installation. Follow these steps to measure and cut planks precisely:
- Measure the space: Begin by measuring the length and width of the area you intend to install your LVP. This will help determine the size and quantity of planks needed.
- Mark the planks: Using a straight edge and pencil, mark the cutting line on the vinyl plank based on the measurements. Ensure that you have considered the necessary expansion gaps.
- Secure the plank: Place the plank on a stable surface and securely clamp it down to prevent movement during cutting.
- Make the cut: Using your choice of cutting tool, carefully follow the marked cutting line to create a precise and clean edge. Keep a sharp blade in your cutting tool and practice on scrap pieces before attempting on planks.
Step 5 – Installing the Planks
With the planks precisely cut and ready for installation, it’s time to lay them down.
Adhering the Planks
Depending on the type of LVP, there are different methods of adhering the planks to the subfloor. These methods include:
- Glue-down: This method involves applying a specially formulated vinyl adhesive to the subfloor, sticking the vinyl planks firmly in place.
- Click-lock: The click-lock system features interlocking edges, allowing planks to snap together without the need for adhesives.
- Loose lay: Loose lay LVP has a non-slip backing that keeps the planks in place without gluing. This method is ideal for temporary installations or areas with low foot traffic.
Follow the manufacturer’s guidelines for the best adherence method for your specific LVP product.
Staggering the Planks for a Natural Appearance
To achieve a natural wood look with your LVP, it’s essential to stagger the planks effectively. One common method is the “1/3 rule,” wherein the end joints are staggered by at least one-third of a plank’s length. Staggering the planks adds visual interest, increases stability, and minimizes the risk of pattern repetition, which can detract from the overall appearance.
Begin the installation with full-length planks for the first row, and then use partial planks for the second row, ensuring that the end joints are offset by at least 33%. Continue this pattern for the entire installation, mixing and matching different size planks as needed.
Take a step back and evaluate your work throughout the installation process to ensure a natural and visually appealing result.
Step 6 – Finishing Touches
Once you’ve successfully installed your LVP wide plank flooring, the final step is to add the finishing touches to ensure a clean and professional look.
Reinstalling Baseboards or Trim
Begin by taking your time to reinstall the baseboards or trim you removed earlier. Place the baseboards back in their original positions and secure them with the proper tools and materials. Not only do baseboards give your room a finished appearance, but they also help protect the walls from possible damage.
To avoid gaps between the floor and the baseboard, use caulking to seal any joints or wall-floors intersections. This will add a clean and polished look to your LVP wide plank flooring installation.
Cleaning and Maintenance Tips
After completing the installation, it’s essential to clean and maintain your new LVP wide plank flooring to ensure its longevity and appeal. Here are a few cleaning and maintenance tips to follow:
- Start by vacuuming or sweeping the floors to remove any dust and debris left behind from the installation process.
- Use a microfiber mop and a nonabrasive cleaner specially designed for LVP flooring to clean the surface.
- Avoid using harsh chemicals or abrasive cleaning tools that can scratch, wear down, or damage the floor.
- Take preventive measures, such as using felt pads or furniture coasters to protect the flooring from scratches or dents caused by furniture.
- Immediately clean up spills to prevent stains or damage to the flooring.
- To maintain the shine and luster of your LVP wide plank flooring, invest in a high-quality floor polish or restorer recommended by the flooring manufacturer.
Benefits of Hiring a Professional Flooring Installer
There are several benefits of hiring a professional flooring installer, including:
- Experience and expertise: Professional flooring installers have years of experience and expertise in installing all types of flooring. They know how to handle different types of floors and can ensure that the installation process is done correctly.
- Proper equipment and tools: Professional flooring installers have the proper equipment and tools needed for the installation process. They can ensure that the floors are installed correctly and are level.
- Time-saving: Professionals can complete the installation process in a timely manner, saving you time and money.
- Quality work: Professional flooring installers can provide high-quality work, ensuring that your floors look great and are installed properly.
- Warranty: Many professional flooring installers offer a warranty on their work, giving you peace of mind in case there are any issues with the installation.
- Advice and recommendations: Professional flooring installers can provide advice and recommendations on the best flooring options for your home or business based on your needs and budget.
To sum up, the cost of professional installation can vary significantly depending on several factors, including the type of project, complexity, and location. It’s essential to gather multiple quotes, understand what’s included in the pricing, and ask questions to ensure you’re getting a fair and reasonable deal. By following these tips, you can minimize your installation expenses and enjoy a professionally-installed setup without breaking the bank.
About The Author

Daniel Meeks
April 19, 2023
Daniel Meeks is a flooring expert with over 10 years of experience in the industry. Holding a BS in Marketing from Emerson College, Daniel has spent his professional career writing for some of the biggest names in interior design. In his spare time, Daniel enjoys hiking, baking, and hanging out with his dog, Artie.